
iOS Navigation Series: The Basics (with SwiftUI examples)
- Eric Palma

- Sep 23, 2023
- 4 min read
Updated: Apr 24
Navigating through the world of iOS development can be a thrilling yet intricate journey, much like exploring a new city. Just as you choose your mode of transportation to get around, in the iOS development landscape, you have two major options: Stack-Based Navigation and Tabbed Navigation. These two navigation paradigms serve as the foundation for how users interact with your app, determining the flow and structure of their experience.
In this post, we'll take a simple and straightforward approach to unraveling the concepts behind Stack-Based and Tabbed Navigation, empowering you to make informed decisions when building your own iOS applications. So, hop on board as we embark on this guided tour through the world of iOS navigation with SwiftUI!
Stack-based navigation
Stack-Based Navigation, also known as Hierarchical or Push Navigation, is a fundamental navigation pattern in iOS development. It's based on the concept of a navigation stack, which behaves much like a stack of cards or pages. Each screen or view in your app is pushed onto this navigation stack as the user navigates deeper into your app, creating a hierarchical structure.
We can look at a real world example by examining how Apple’s Developer app uses Stack-Based Navigation. Please examine the image below:

The “Discover” screen (1) is the root screen where we start. It contains a list of articles which users can click on to read. In this instance you can see that clicking on the article cell titled “WWDC23 highlights” causes the detail view (2) for the article to be pushed onto the stack.
This detail view contains the article itself and now sits on top of the previous screen, which is the “Discover" screen. We continue navigating in this same hierarchical fashion as seen when we click on the article cell titled “Principles of spatial design” within screen #2.
Doing this takes us to the last screen (3). At this point our navigation stack has three screens, with each one sitting right above the previous screen used to navigate to it. To get back to the previous screen we have to remove each screen sitting above it on the navigation stack. We can do this by clicking the back button at the top left of each screen as shown below:

Stack-based navigation in SwiftUI
Here's a simple example of the navigation stack implementation in SwiftUI for the Developer app.
NavigationStack is a SwiftUI view that implements the navigation stack pattern.
In this example, the List acts as the root view. It contains a list of NavigationLinks, which is a clickable view that controls a navigation presentation. Here NavigationLink is used to control navigation of Article data types.
navigationDestination(for:destination:) is used to associate a destination view with a presented data type for use within a navigation stack. In this case ArticleDetailView is the navigation destination and it is associated with the Article data type.
If we have multiple possible destination views, we could associate them with their respective data types by adding more navigationDestination(for:destination:) modifiers. The below example adds another destination associated with String types:
Lastly, we can also add additional screens to our navigation stack from our detail/child screens. Taking the ArticleDetailView from our example code above, it can present its own child view by declaring a NavigationLink associated with either String or Article values. Here is an example using String:
Stack-Based Navigation is known for its simplicity and ease of use, making it a popular choice for apps with a straightforward and linear structure. However, it may not be the best option for apps with complex and non-linear navigation requirements, which is where Tabbed Navigation comes into play.
To learn how to programmatically control the navigation stack in SwiftUI, check out: Programmatic Navigation with SwiftUI
Tabbed Navigation
Tabbed Navigation is a prevalent and user-friendly navigation pattern in iOS app development. It's designed to provide quick and direct access to different sections or functionalities of an app by organizing them into a set of tabs, often displayed at the bottom of the screen.
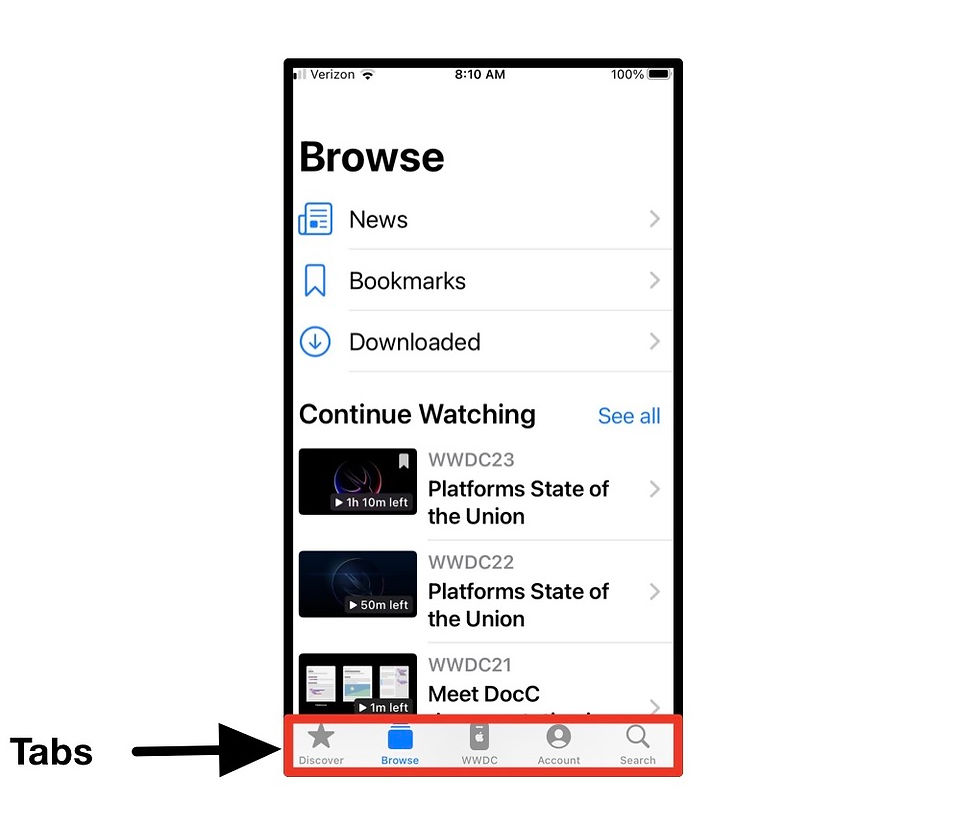
Users can seamlessly switch between tabs to explore various aspects of the application without losing their current context. Tabbed Navigation is often employed in apps where content or features can be compartmentalized into separate categories or where there are multiple primary functions.
Below is an illustration depicting how the transitions between screens in tabbed navigation differ from the linear navigation of stack-based navigation.


It is quickly apparent that Tabbed Navigation gives users more flexibility in how they navigate throughout an app, because there is no hierarchical structure imposed. Also, notice how the tab bar highlights the selected tab, giving them a clear indication of their current location and providing a sense of continuity.
In summary, Tabbed Navigation is an intuitive and straightforward way to organize and navigate through an iOS app's content and features. It offers users the convenience of quick access to different sections while maintaining a clear and consistent user interface. When used appropriately, Tabbed Navigation can enhance the usability and engagement of your iOS app.
Tabbed Navigation in SwiftUI
Now that we’ve covered the basics of what Tabbed Navigation is, I will now demonstrate how to quickly implement it. Assume we are building Apple’s Developer app from the images above.
Adds the TabView to the view hierarchy. This view will display our tabs and be in charge of the transitions.
Here we add each screen we want to navigate to using tabs.
The tabItem(_:) modifier associates a view with a tab bar item to be displayed within the tab bar.
To learn how to control the TabView programmatically, checkout: Programmatic Navigation with SwiftUI
Conclusion
As we wrap up this inaugural part of our series on iOS app navigation, we've taken the first steps in understanding the key principles of Stack-Based Navigation and Tabbed Navigation. Much like embarking on a journey through a new city, our exploration has just begun, so make sure to subscribe to our newsletter and get notified of our latest posts.
In the upcoming segments of this series, we'll dive even deeper into these navigation paradigms, examining how we can combine the two, best practices, and implementation techniques. Armed with this foundational knowledge, you'll be well-prepared to navigate the complex landscape of iOS app development and create engaging user experiences. So, stay tuned for the next leg of our journey as we continue to uncover the secrets of iOS navigation.


Comentários